Lenovo Thinkpad X13s - day 5

Now with the nvme working I was able to get down to work. Installed debian following the linaro guide and updated to current stable (bookworm). The only difference from the guide is that it never asked me about installing grub which is strange. Also had to check every single partition to find the efi files in the efi shell to insert debian as the first item.

At this point video acceleration, bluetooth and sound did not work. Also the system clock was getting reset every boot. There's a script to install more firmware and other things but it broke the system for me becaus it updated to sid without my approval. So had to reinstall it.

This time around I decided to try converting to devuan after installing all the updates. Unfortunately I ran the commands in the wrong order by accident and ended up with a dead system. Reinstall again.

Finally this time I followed the guide correctly but it was not as simple as they made it sound. The upgrade refused to proceed smoothly as there was a package conflicting with some systemd files. Apparently it's possible to tell dpkg to ignore that and overwrite but the method for passing that argument via apt is ridiculous:

apt-get -o Dpkg::Options::="--force-overwrite" install $PACKAGE

That was not enough however, as now systemd refused to be removed because it's the currently running init system. That required editing out the check... somewhere. I can't quite remember where it was now but just google around for the error message when you get it.

At this point network manager died and apt install -f was failing because it needed to download some more packages. Ended up manually connecting to wifi with wpa_supplicant and dhclient. This allowed the conversion to finally complete and... after a reboot it actually worked, surprisingly enough. Although clock at this point stopped resetting to July 2022 and now reset to 1970 for some reason on every boot. Also the battery daemon did not start on its own because it's only meant to work with systemd.

Manually and selectivelly executing the linaro upgrade script did not allow me get audio or hardware acceleration going.

Honestly this has become too troublesome and I think I will end up just using vanilla debian for the time being. Until the hardware is better supported it's best to stick to what others have tried.

I will continue reinstalling and testing for now. I ordered a new 1TB SSD to put in here so that my final setup will be a LUKS secured OS with no windows in sight. The stock SSD will only be used to boot windows and update the bios once a year. Hopefully I can get the system in mostly working order by the time I need to travel abroad.
Tagged under hardware linux x13s

Lenovo Thinkpad X13s - day 4

A bit of a pause due to life getting in the way but I'm now able to get back to setting up this device.

Got a cheap SSD to try my luck and see if it makes a difference, but alas it was still not detected. That's 5$ down the drain.

Next, however, I noticed that there's a bios update available from lenovo - 1.58. There's nothing about SSD/pcie/nvme in the release notes but I decided to try it anyway. Lo and behold - the nvme is now visible when booting from the arch iso. Perhaps folks at lenovo heard my plea and decided to fix it up. Or maybe it's just something random, who knows. Regadless, I am now able to continue the linux on arm quest this weekend. Looking forward to it.

As a side note, when looking up how to open the laptop up I noticed that my version has an extra heatsink on the SSD. Perhaps my exact model is a bit special?

Tagged under hardware linux x13s

Lenovo Thinkpad X13s - day 3

This will be fairly short as I'm still suck on the nvme issue.

After armbian I tried ironrobin's arch iso and same issue, no nvme visible. After a bit more debugging I found that the system thinks nothing is plugged into the pci slot so there's nothing to initialize.

Here's what my log looks like:

[    4.055956] pci_bus 0002:00: root bus resource [bus 00-ff]
[    4.055974] pci_bus 0002:00: root bus resource [io  0x100000-0x1fffff] (bus address [0x0000-0xfffff])
[    4.055987] pci_bus 0002:00: root bus resource [mem 0x3c300000-0x3dffffff]
[    4.056036] pci 0002:00:00.0: [17cb:010e] type 01 class 0x060400
[    4.056063] pci 0002:00:00.0: reg 0x10: [mem 0x00000000-0x00000fff]
[    4.056163] pci 0002:00:00.0: PME# supported from D0 D3hot D3cold
[    4.057651] pci 0002:00:00.0: BAR 0: assigned [mem 0x3c300000-0x3c300fff]
[    4.057656] pci 0002:00:00.0: PCI bridge to [bus 01-ff]
[    4.058091] pcieport 0002:00:00.0: PME: Signaling with IRQ 202
[    4.060058] pcieport 0002:00:00.0: AER: enabled with IRQ 202

And here's what it should look like on a system where it works:

[    1.387786] pci_bus 0002:00: root bus resource [bus 00-ff]
[    1.387793] pci_bus 0002:00: root bus resource [io  0x100000-0x1fffff] (bus address [0x0000-0xfffff])
[    1.387795] pci 0006:00:00.0: [17cb:010e] type 01 class 0x060400
[    1.387798] pci_bus 0002:00: root bus resource [mem 0x3c300000-0x3dffffff]
[    1.387813] pci 0006:00:00.0: reg 0x10: [mem 0x00000000-0x00000fff]
[    1.387826] pci 0002:00:00.0: [17cb:010e] type 01 class 0x060400
[    1.387844] pci 0002:00:00.0: reg 0x10: [mem 0x00000000-0x00000fff]
[    1.387916] pci 0006:00:00.0: PME# supported from D0 D3hot D3cold
[    1.387933] pci 0002:00:00.0: PME# supported from D0 D3hot D3cold
[    1.393048] pci 0002:01:00.0: [1987:5013] type 00 class 0x010802
[    1.393061] pci 0006:01:00.0: [17cb:1103] type 00 class 0x028000
[    1.393237] pci 0002:01:00.0: reg 0x10: [mem 0x00000000-0x00003fff 64bit]
[    1.393244] pci 0006:01:00.0: reg 0x10: [mem 0x00000000-0x001fffff 64bit]
[    1.394377] pci 0006:01:00.0: PME# supported from D0 D3hot D3cold
[    1.406022] pci 0002:00:00.0: BAR 14: assigned [mem 0x3c300000-0x3c3fffff]
[    1.406032] pci 0002:00:00.0: BAR 0: assigned [mem 0x3c400000-0x3c400fff]
[    1.406039] pci 0002:01:00.0: BAR 0: assigned [mem 0x3c300000-0x3c303fff 64bit]
[    1.406084] pci 0002:00:00.0: PCI bridge to [bus 01-ff]
[    1.406088] pci 0002:00:00.0:   bridge window [mem 0x3c300000-0x3c3fffff]
[    1.407254] pcieport 0002:00:00.0: PME: Signaling with IRQ 198
[    1.408653] pcieport 0002:00:00.0: AER: enabled with IRQ 198
[    1.409064] nvme nvme0: pci function 0002:01:00.0
[    1.409078] nvme 0002:01:00.0: enabling device (0000 -> 0002)

I thought maybe there's a bug in detecting the device correctly so I tried to manually tell the system to load the hardware with the nvme driver:

# echo 0002:00:00.0 > /sys/bus/pci/drivers/pcieport/unbind
# echo 0002:00:00.0 > /sys/bus/pci/drivers/nvme/bind

But that didn't work either, it fails with:

bash: echo: write error: No such device

Which probably means driver refuses to work with device due to some check.

At this point there's not much to do. I'll try booting later with another drive but overall this is fairly frustrating since I seem to be the only one who is encountering such an issue despite everyone using the same hardware. I'm on the same 1.57 firmware and there aren't any settings in the UEFI that are related to this. If there are no updates for a while it doesn't mean I'm not trying, just that there's nothing to report.

Tagged under hardware linux x13s

Lenovo Thinkpad X13s - day 2

This one's going to be short. I was able to boot armbian from usb into a partially working desktop, but even here I cannot access the nvme. This leads me to believe the problem is more fundamental, something like this. I don't see those exact error messages but this seems to be the most likely cuprit. And without an accessible nvme drive I'm completely stuck.

Armbian image is currently on the 6.3.13 kernel while latest is 6.5.1. Maybe the fix is in there already. I'll try updating this and see if it makes a difference, but that's task for another day.

Tagged under hardware linux x13s

Lenovo Thinkpad X13s - day 1

Alright, first day of getting this thing running. Seems like devuan can't be directly installed on arm devices so I will install latest debian instead and then migrate to devuan.

To start I am following this guide that uses oldstable debian version at the time of writing. It suggests using the iso image made by the author... but I don't trust it. Intead I am trying this using the official iso.

Parts that need to be done in windows are easy... resize partition and disable bitlocker. Then also disabling secureboot in the system setup. So far so good.

Then need to grab the latest iso and write it to a usb drive (a dual type-c/type-a drive is handy for constantly swapping between devices). That part is simple enough - go to debian website, grab iso, and dd it to the usb drive. Seems like debian only provides a netinstall image for arm64, I try it first.

Try to boot it... nothing. Device not found. Turns out that it can't boot from the charging port, but it can from the secondary port.

Now I can get to grub, and select install... black screen with a cursor, otherwise unresponsive. Waiting doesn't produce any results. So I decide to get the full dvd image instead in case there is some missing firmware, and just to make installation easier without an internet connection once it finally works. The way to do this is to use jigdo-file to build the iso locally for the target system, more details on that here.

With the full image written to usb I try again... still nothing. I remember that the boot is probably silencing something so I go in and remove the quiet` parameter. The result is:

EFI stub: Booting Linux Kernel...
EFI stub: Using DTB from configuration table
EFI stub: Exiting boot services...

Right, DTB files are necessary to boot, this being arm after all. I'm not sure if the file is on the system somewhere so I extract it from the latest kernel image and put it on the iso using isomaster.

This doesn't seem to solve the problem though, exact same output. After some googling around I run across this post which suggests adding earlycon=efifb to the kernel parameters.

This finally makes some difference. The same thing as before is printed, followed by a whole bunch of crap. Seems like it tries to start but still gets stuck somewhere immediately. This doesn't actually change anything, it just prints out more debug information that was previously hidden. To make sure I can go over everything that's outputted, I record the process with a 60fps camera. Some of the early output is only visible for about a second before it's gone. Unfortunately nothing interesting is visible: it correctly identifies the model, sees disabled secureboot, etc. In the end it's stuck at:

sched_clock: 56 bits at 19MHz, resolution of 52ms, wraps every 4398046511078ns

At this point I got kinda stuck and decided to try the iso I didn't trust. This one magically boots but even if I want to proceed with installation I can't - it only detects the usb drive and not the main nvme drive. Doing modprobe nvme doesn't seem to make any difference.

As a last resort I tried the latest weekly debian boot image but there's no difference. The cause I'm guessing is the one described in this pull request that was merged into fedora just yesterday.

That's enough for today, not in the mood to cross compile grub with and replace the one on the standard iso after spending so many hours on this already. Long road to working system ahead.

Tagged under hardware linux x13s

Lenovo Thinkpad X13s

I have been searching for a new laptop for a while to replace my aging and half broken asus zenbook from over 7 years ago and after a long search have decided to get my hands on a thinkpad model from last year. What makes it special is that it's arm, and unlike other snapdragon laptops/chromebooks, this one kinda has official support. The opposite of freedom-hating samsung on their galaxy book with the same chipset.

Here I will document my process of replacing windows with devuan over the next few weeks. There are some guides online but many are outdated or partial. You will witness the most up to date experience of getting it up and running.

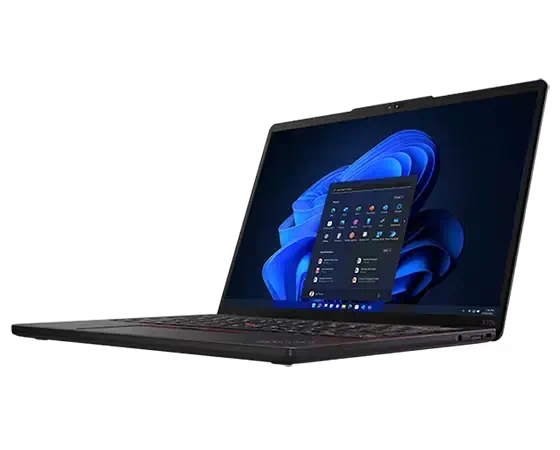
official x13s photo

Got this little beast for only $470. Jelly?

Tagged under hardware linux x13s

Sennheiser Profile

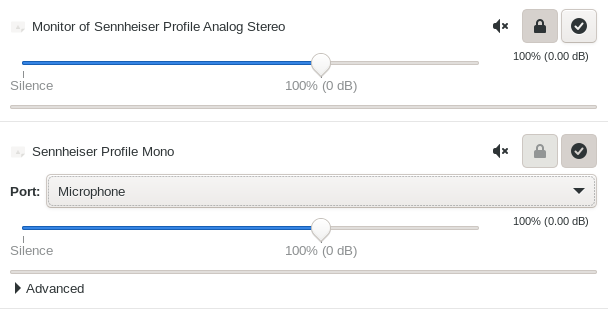
Just an indirect reply to random dude asking if the fairly new sennheiser profile usb microphone works on linux.

pulseaudio volume control

Yes, son, yes it does. Why wouldn't it?

Tagged under hardware linux

Auto upload from shell

Naturally, first thing's first - ability to actually upload content to this blog. Pelican (link in footer) generates a bunch of static HTML files perfect for neocities but there's not an easy way to upload them programatically via the shell.

Of course I'm aware that neocities provides a cli uploader, but unfortunately it's ruby garbage and I'm not willing to pollute my system with that. Luckily they also provide an api and even a curl example. Good, I can work with this.

Pelican, if you're not aware, comes with makefile with a bunch of targets to compile html, publish, run a local server, etc. First idea is to simply upload files one by one with curl upon running make publish. You can stick the following bit inside the publish target.:

cd "$(OUTPUTDIR)"; \
find . -type f -exec curl -H "$(AUTH_HEADER)" https://neocities.org/api/upload -F "{}=@{}" \;

AUTH_HEADER is simply the api key header defined above. This will upload files one by one from the output directory even if nothing has changed. Luckily find can use a file as a reference to find all files modified since. With that improvement the command becomes:

cd "$(OUTPUTDIR)"; \
find . -type f -newer "$(REFERENCE)" -exec curl -H "$(AUTH_HEADER)" https://neocities.org/api/upload -F "{}=@{}" \; ; \
touch "$(REFERENCE)"

REFERENCE is just a path to a file (in my case .reference) that I have to touch manually the first time and that I added to .gitignore. While HTML files are all generated every time and all have to be re-uploaded, at least static files will now only be uploaded when changed.

Tagged under neocities pelican cli automation

Hello world

Test pelican. This is my chair.

exquisite chair

Plan is to just log loonix related troubles. Mostly for myself so I don't forget but if someone else finds it helpful then great.